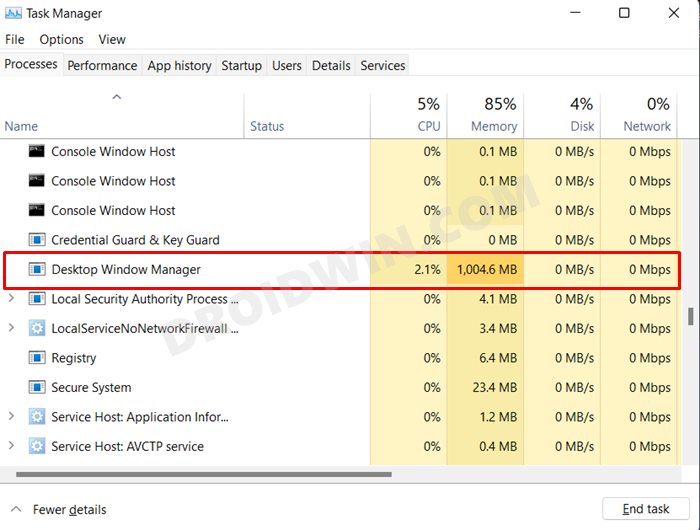
However, the more the number of background processes running simultaneously, the more will be the load on your system. This would result in a higher probability of your PC being slowed down or not performing along the expected lines. And this is what my PC was going through in the last few weeks. Upon doing further inspection, I found out that it was the dwm.exe that more often than not was consuming an exorbitant amount of system resources.
For the unware, Desktop Window manager is a process in Windows OS that is responsible for managing visual elements, animations, transparency effects, live taskbar thumbnails, among others. Coming back to the point, one fix that straight away came to my mind was to simply End Task this dwm.exe process via the Task Manager. While it did work out but only for a short while. After every reboot, this process would be up and running again and so would be the issues of high memory consumption. So what else could be done to rectify this ever-lasting problem? Well, there do exist a couple of workarounds that have managed to fix the issue of Desktop Window Manager dwm.exe consuming high CPU and memory on Windows 10/11. And in this guide, we will make you aware of just that. So without any further ado, let’s get started.
FIX Desktop Window Manager dwm.exe Consumes High CPU/Memory
Do note that there’s no universal fix as such. You will have to try out each of the below-mentioned workarounds and then check which one spells out success. Droidwin and its members wouldn’t be held responsible in case of a thermonuclear war, your alarm doesn’t wake you up, or if anything happens to your PC by performing the below steps.
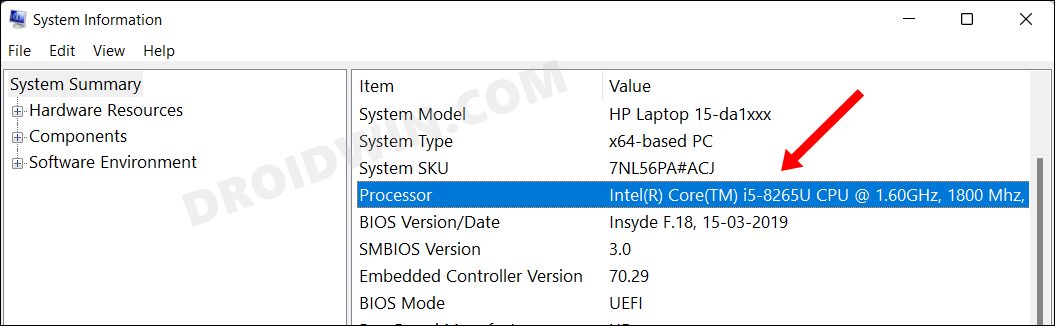
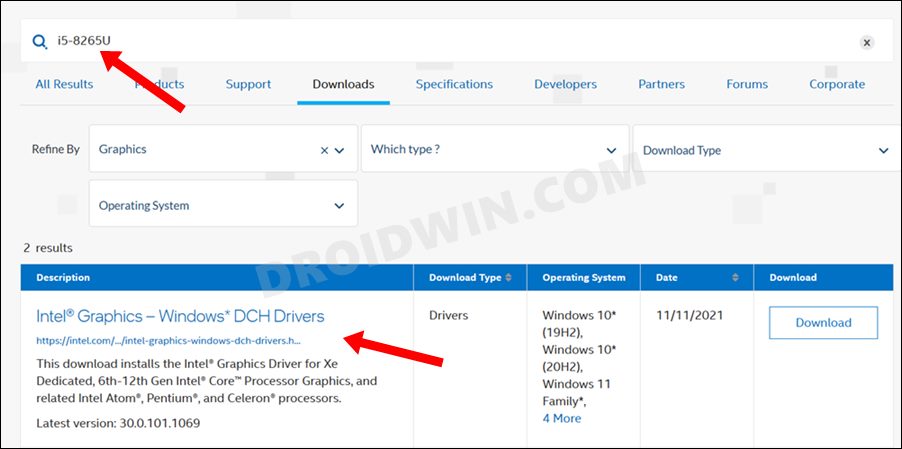
FIX 1: Downgrade Intel Display Drivers
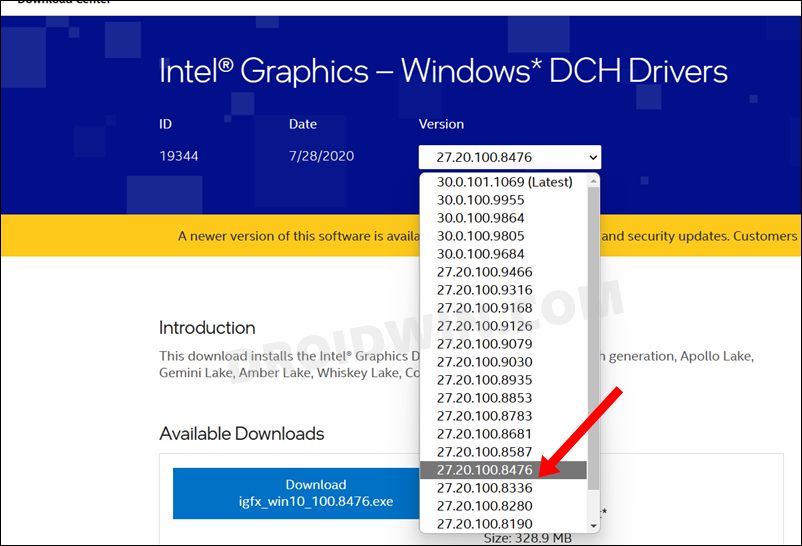
The fix that comes with the highest success rate requires you to downgrade your Intel Graphics drivers to an older build. At the time of writing, it might be something along the lines of v30.x.xxx.xxxx. However, you will have to downgrade it to build number 27.20.100.8476. This precise build number has been verified to spell out success, we can’t say for version number before it (26, 25, etc) but for sure you shouldn’t be using a higher version number than the 27th build. So with that in mind, let’s start off with the downgrade process.
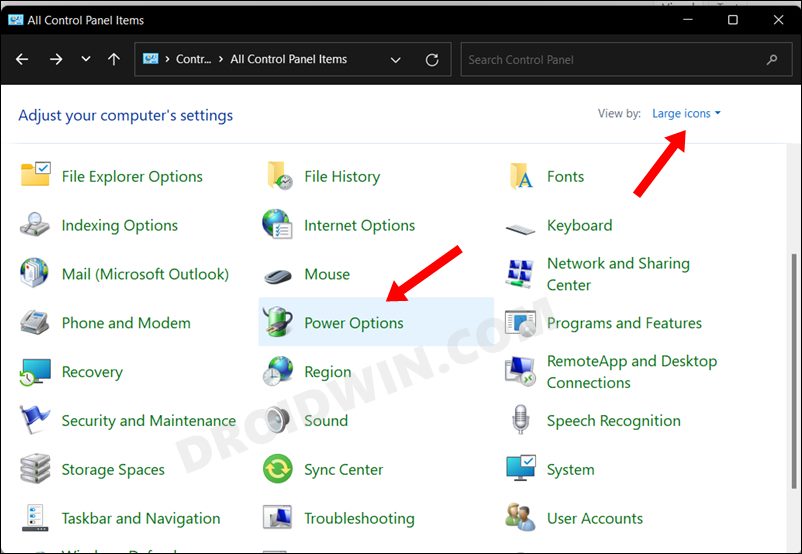
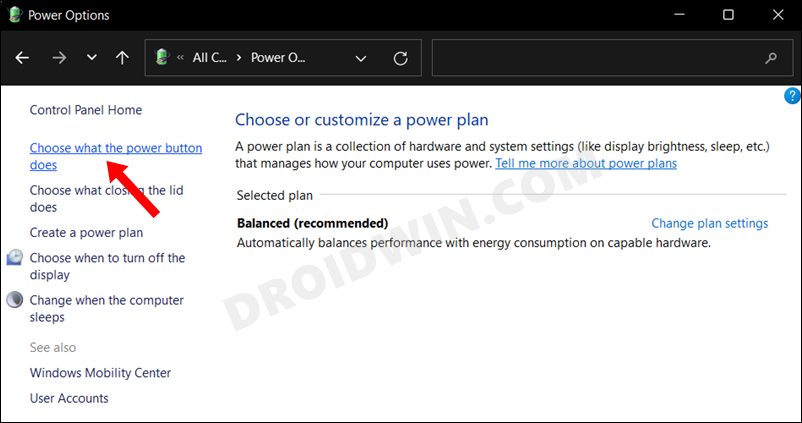
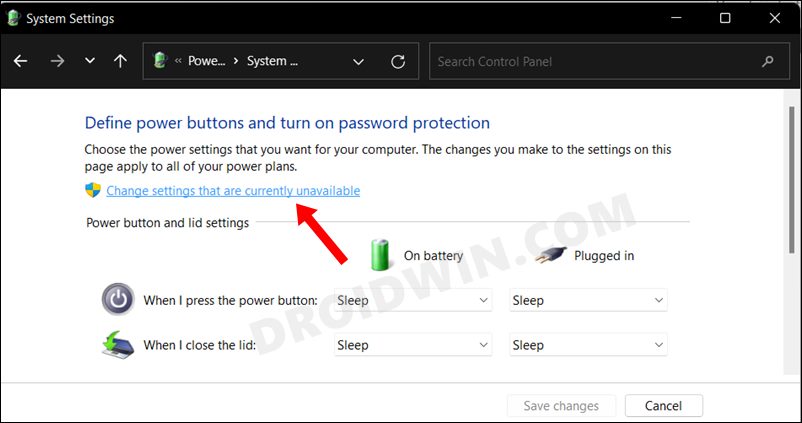
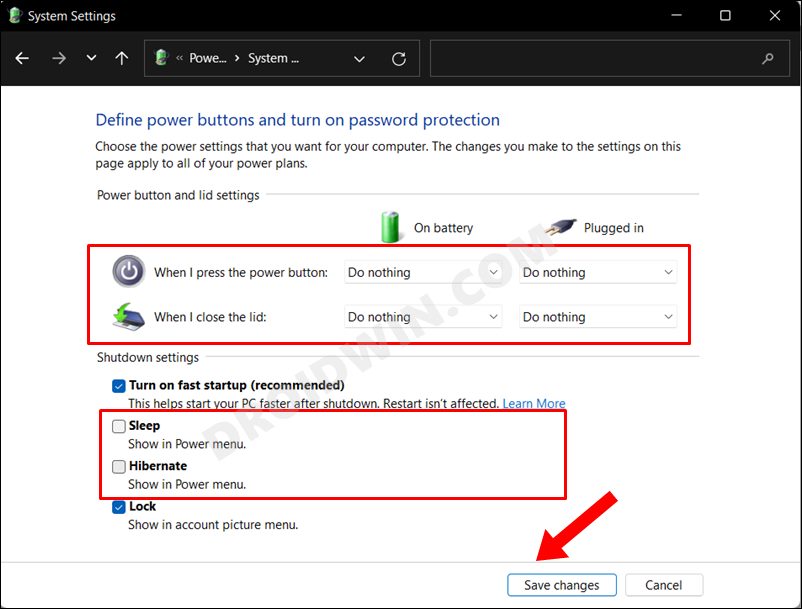
FIX 2: Disable Sleep and Hibernate in Windows 11
Some users were able to rectify this issue after disabling Sleep and Hibernate functionalities on their PC. So follow along with the below instruction steps to try it out.
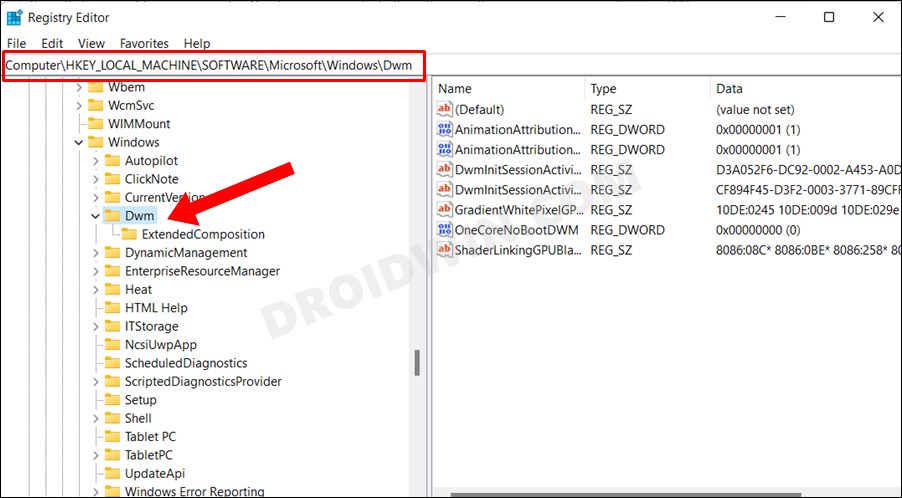
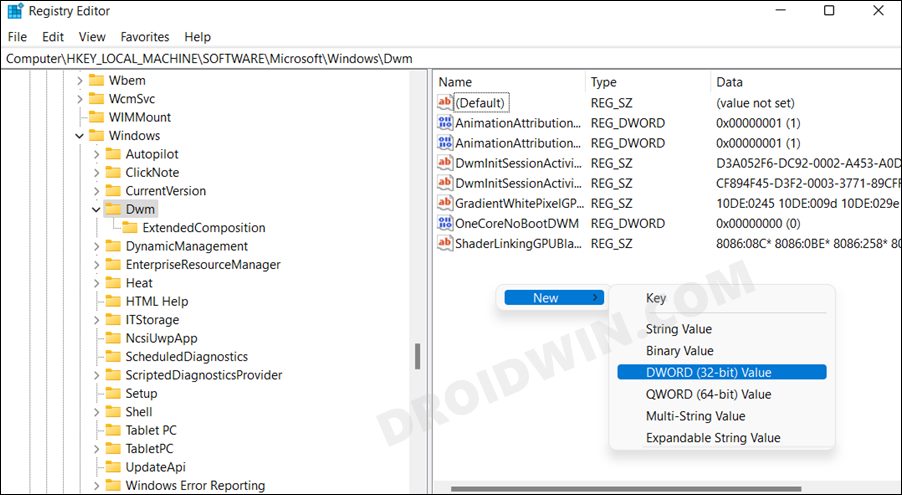
FIX 3: Using the Registry Editor Tweak
In this method, we will be explicitly creating a ForceEffectMode registry key and then disable it by assigning the False (0) value. Here’s how: With this, we round off the guide on how you could fix the issue of Desktop Window Manager dwm.exe consuming high CPU and memory issues on Windows 10/11. We have shared three different methods for the same. In my case, the first method of downgrading Intel drivers to an earlier build did the trick. Do let us know in the comments section which one worked out in your favor.
Antimalware Service Executable High CPU/Memory Usage: How to FixHow to Fix Windows 11 High CPU and Disk UsageHow to Change Priority of an App in Windows 11Check Your Windows 11 PC Battery Health and Generate its Report
About Chief Editor