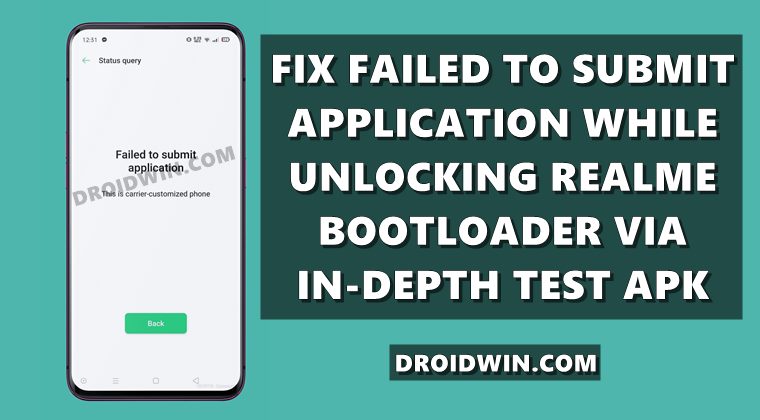
Right from flashing a custom ROM to installing a custom recovery like TWRP, there’s a lot to try out. Likewise, you could also gain access to the system partition by rooting the device via Magisk. Once you do so, you could then welcome a plentitude of mods such as Xposed Framework, Substratum Themes, Magisk Modules. But how could this unlocking process be carried out? While other OEMs usually require just a single line of Fastboot Command, with Reame things are a little bit different. They require you to download and install the device-specific In-Depth Test APK onto your device. Then launch the tool, accept the Terms and Conditions and submit your application. Your application will then be verified within 15-20 minutes and you shall be notified of the same. However, some users have complained that they aren’t able to do proceed with the verification. Rather, they are being greeted with the Failed to Submit Application error which results in the inability to unlock their Realme device’s bootloader. If you are also getting bugged with this issue, then this guide is here to help you out. Follow along.
How to Unbrick Realme Device via Fastboot CommandsHow to Extract Fastboot Images from Realme/Oppo OZIP FirmwareFlash OFP File in Realme Devices using Realme Flash ToolHow to Boot Realme Devices to EDL Mode (3 Methods) | Unbrick ItFix: Realme “The current image (boot/recovery) have been destroyed”
Fix Realme Bootloader Unlock Failed to Submit Application Error
We have shared two different methods. You should start off with the first method and if it doesn’t work out, then only proceed with the second method. Do keep in mind that unlocking the bootloader will wipe off all the data and might make the device’s warranty null and void. So take a backup beforehand and proceed with caution. Droidwin and its members wouldn’t be held responsible in case of a thermonuclear war, your alarm doesn’t wake you up, or if anything happens to your device and data by performing the below steps.
Method 1: Fix Failed to Submit Application Error Via Network Tweak
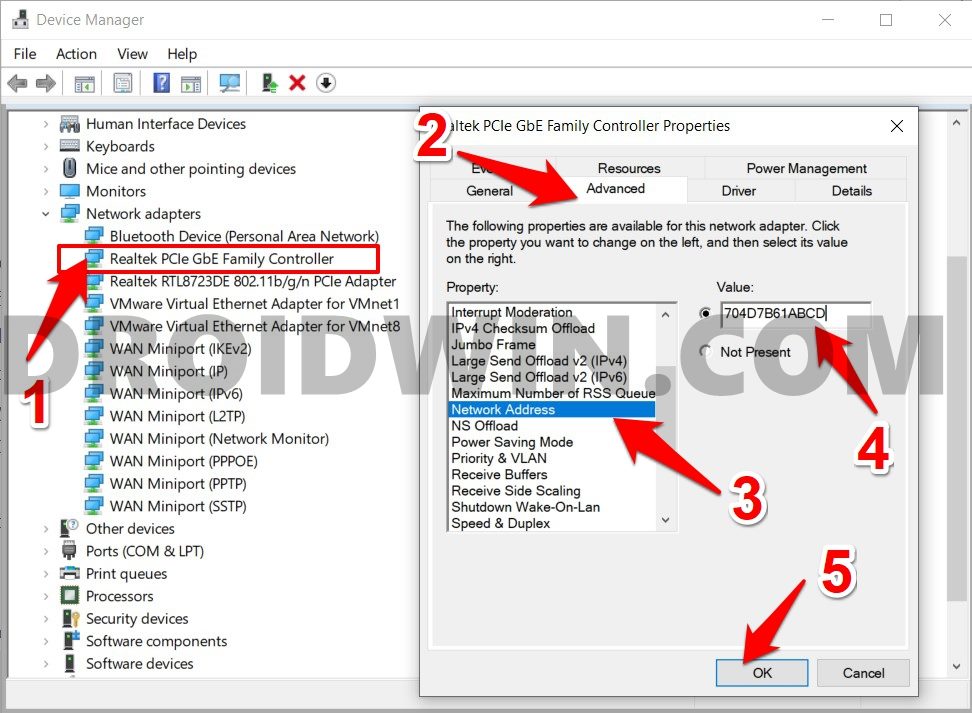
In this method, we will be changing the location of your PC’s network Adapter via Device Manager to which your device is connected. But how will this tweak fix the issue? Well, the Realme Bootloader Unlock Failed to Submit Application error happens due to a carrier customized phone. So we will trick the device into believing no such change has taken place by spoofing the location to Multilingual Version. Any downsides of this process? I could only document the issue saved WiFi password is deleted. Apart from that, “I” haven’t faced any issues, but you should still exercise caution and proceed at your own risk.
STEP 1: Enable Developer Options and OEM Unlocking
To begin with, you will have to enable USB Debugging and OEM Unlocking on your device. The former will make your device recognizable by the PC in ADB mode. This will then allow you to boot your device to Fastboot Mode. On the other hand, OEM Unlocking is required to carry out the bootloader unlocking process. So head over to Settings > About Phone > Baseband & Kernel > Tap the Build Number 7 times > Then go back to Settings > Additional Settings > Developer Options > Enable OEM Unlocking.
STEP 2: Download Oppo/Realme Unlock Bypass Tool
Next up, download the Unlock Bypass Tool from here: Oppo_Realme_Unlock_Tool.rar. [Credits: XDA Recognized Developer Zacharee1]. Once downloaded, extract to any convenient location on your PC. This tool will come in handy later on to fix the Realme Bootloader Unlock Failed to Submit Application error.
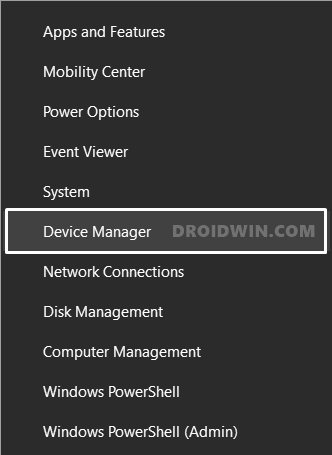
STEP 3: Tweak the Network Address
STEP 4: Unlock Bootloader via In-Depth Test APK
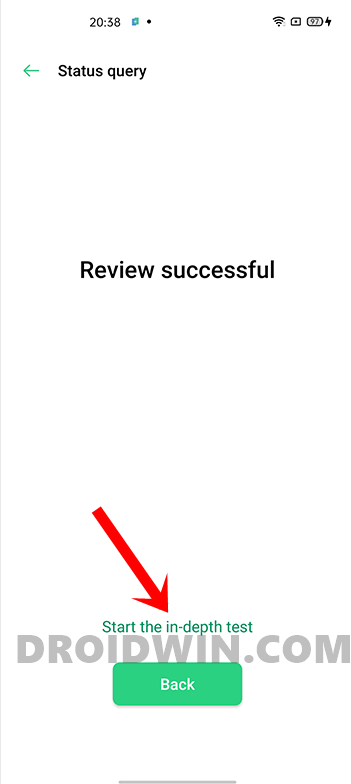
Once that is done, you may now download the In-Depth Test APK for your device and proceed with the on-screen instructions to carry out the unlocking process. All the instructions, as well as the APK file, are given in this guide, please refer to it: A Universal Guide to Unlock Bootloader on any Realme Device. You will no longer get any Failed to Submit Application error message and the bootloader on your Realme device will be successfully unlocked.
How to Pass Magisk SafetyNet on Rooted Android 11Fix Magisk patched boot.img issue while Rooting Android 11How to Pass SafetyNet test after installing Xposed or EdXposedHow to Fix ctsProfile Mismatch Error on Rooted Android
METHOD 2: Fix Failed to Submit Application Error Via Microsoft Loopback Adapter
Oppo might have got hold of our first workaround and seems to have patched it (though not yet confirmed). As a result, some Realme and many Oppo device owners aren’t able to make use of the first tweak. Fret not, there is another pretty impressive tweak that is known to bypass this. Here’s what needs to be done [Credits: XDA Member Sonic Steven]. First and foremost, make sure that you aren’t using any custom MAC Address, if that is the case then revert to the default one. Moreover, if you have already tried the first method and launched the Sec5.exe file, then close it. Make sure that it isn’t running in the background either (via the Task Manager). With that in mind, let’s start off with the second method to fix the Realme Bootloader Unlock Failed to Submit Application error
STEP 1: Enable OEM Unlock
Start off by enabling USB Debugging and OEM Unlocking on your device. Go to Settings > About Phone > Baseband & Kernel > Tap the Build Number 7 times > Then go back to Settings > Additional Settings > Developer Options > Enable OEM Unlocking.
STEP 2: Download Oppo Unlock Tool
Next up, download the Oppo_Realme_Unlock_Tool.rar and extract it to any convenient location on your PC.
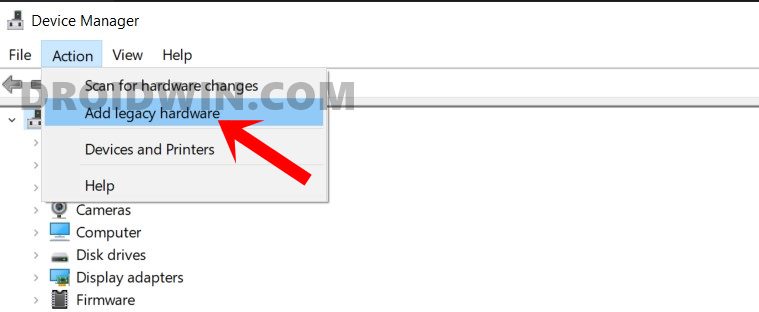
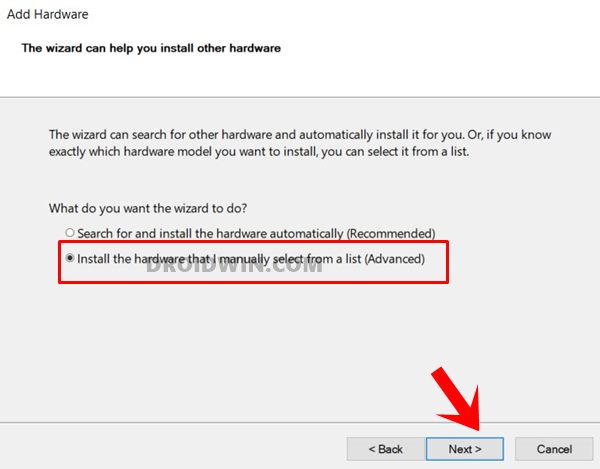
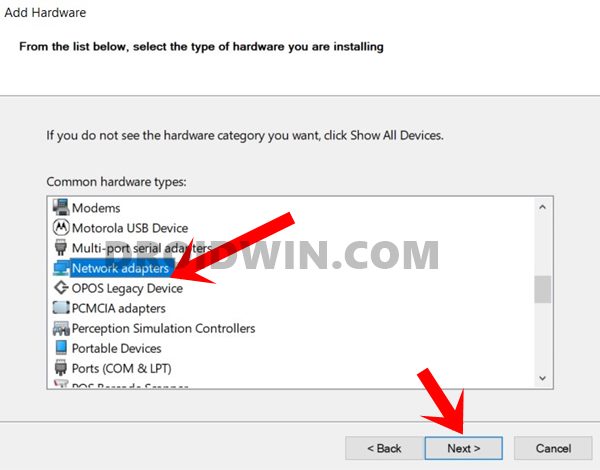
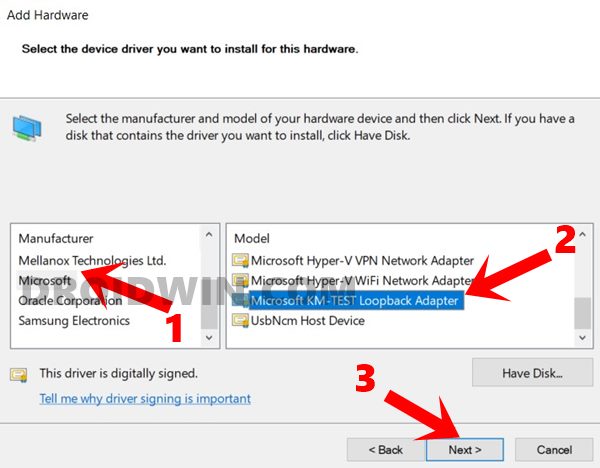
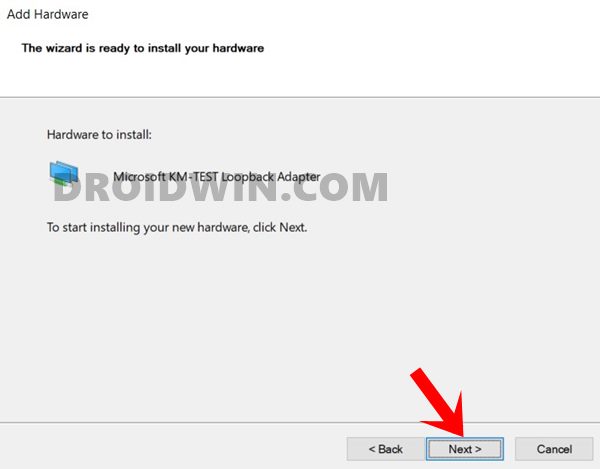
STEP 3: Add Microsoft KM-TEST Loopback Adapter
STEP 4: Change Region to Multilingual Version Ex
STEP 5: Unlock Realme Bootloader via In-Depth APK
Finally, you may now download the In-Depth Test APK file corresponding to your device and carry out the unlocking process. All the related instructions, as well as the APK file, are given in the linked guide, please refer to it: A Universal Guide to Unlock Bootloader on any Realme Device. That’s it. These were the steps to fix the Realme Bootloader Unlock Failed to Submit Application error. If you have any queries concerning the aforementioned steps, do let us know in the comments. We will get back to you with a solution at the earliest.
Fix No WiFi, Calls, Network after Rooting or Flashing Custom ROMHow to Fix FAILED (remote: Command not allowed)Fix FAILED (remote: Partition flashing is not allowed)How to Fix Bootloop after Flashing magisk_patched.img
About Chief Editor
