This in turn not only slows down the browser, but it tends to have an adverse impact on the overall system. This problem has been going on for ages, and we are only able to get a slight breather before the issue re-appears. And this is exactly what is happening as of late. Beginning with version 104, there have been quite a few instances of Out of Memory errors with Chrome.
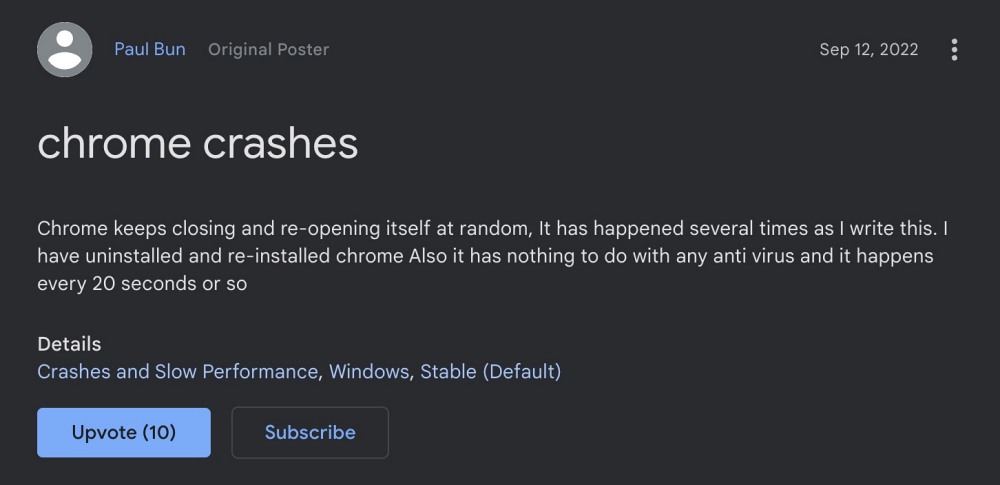
When that happens, the browser suddenly closes and relaunches it after a few seconds. Going through numerous user reports on the Chromium Bugs page, we found out that most of these crashes tend to happen when the browser consumes 2GB or more of RAM. Moreover, on paper, the issue could be affecting other Chromium-based browsers as well.
However, as of late, we haven’t come across any issues with other Chromium browsers [such as Edge, Opera, Vivaldi, etc]. With that said, there does exist a few nifty workarounds that shall help you fix this Google Chrome Out of Memory Crash. So without further ado, let’s check them out.
How to Fix Google Chrome Out of Memory Crash
It is recommended that you try out each of the below-mentioned workarounds and then see which one spells out success for you. So with that in mind, let’s get started.
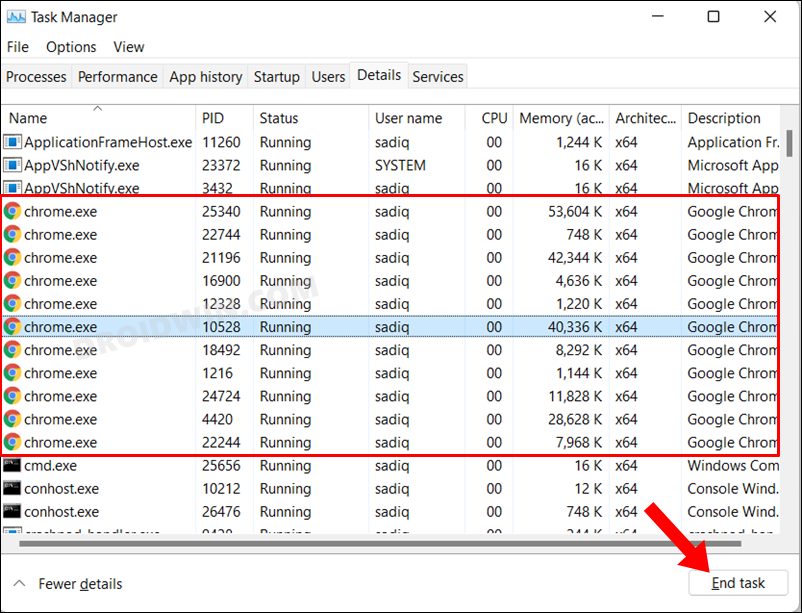
FIX 1: Restart Chrome Processes
Your first course of action should be to restart Chrome and all its processes. Doing so will give it a fresh instance to work upon and this, in turn, might rectify the underlying issue as well.
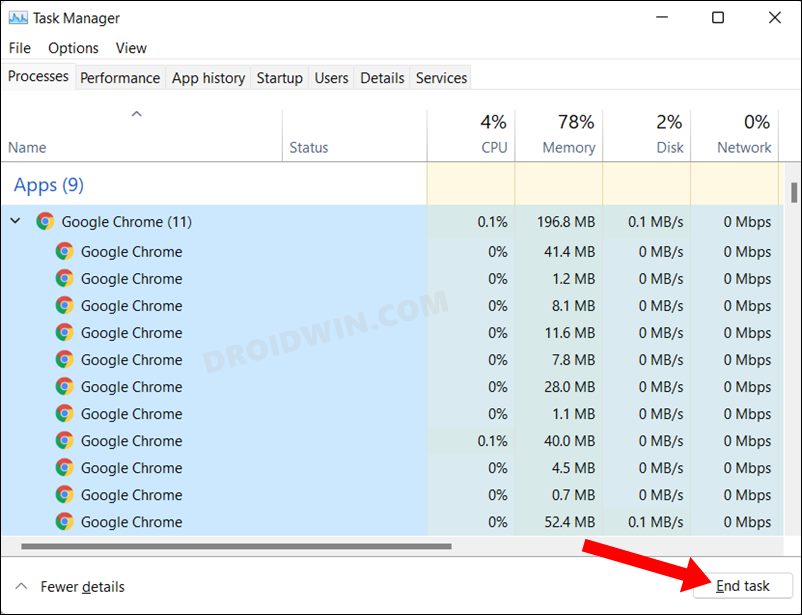
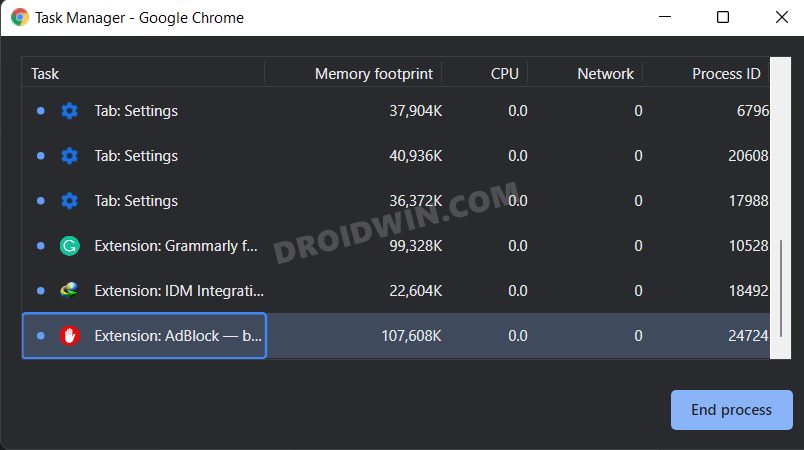
FIX 2: Restart Services via Chrome Task Manager
Chrome comes with a built-in Task Manager that lists out all the running browser services and processes as well as the total CPU and RAM they are consuming. With the help of this data, we will be able to get hold of those services that are consuming more than the permissible level of system resource, and hence they will then be disabled. So proceed with the below steps to try it out:
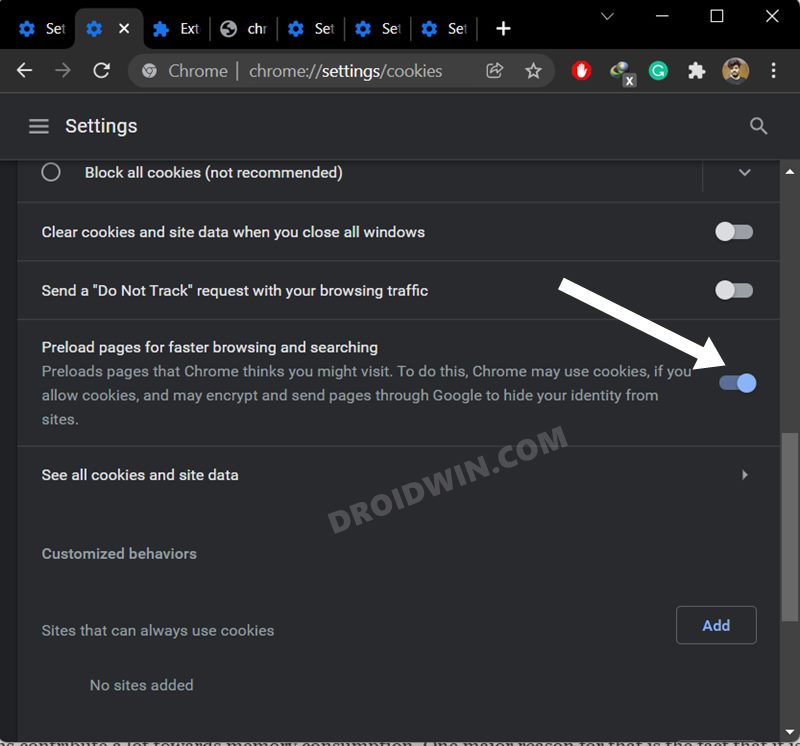
FIX 3: Disable Preload Pages
Chrome automatically preloads a few web pages that it thinks you might visit at a later date. It does so based on the cookies that it had collected and based on your browsing history. However, this feature has more drawbacks than benefits as it ends up consuming necessary storage space as well as crucial system resources, with the only benefit being that you would be able to view these pages a few seconds earlier. So with the caveats outweighing the perks, it’s better to keep this feature disabled, which could be done as follows:
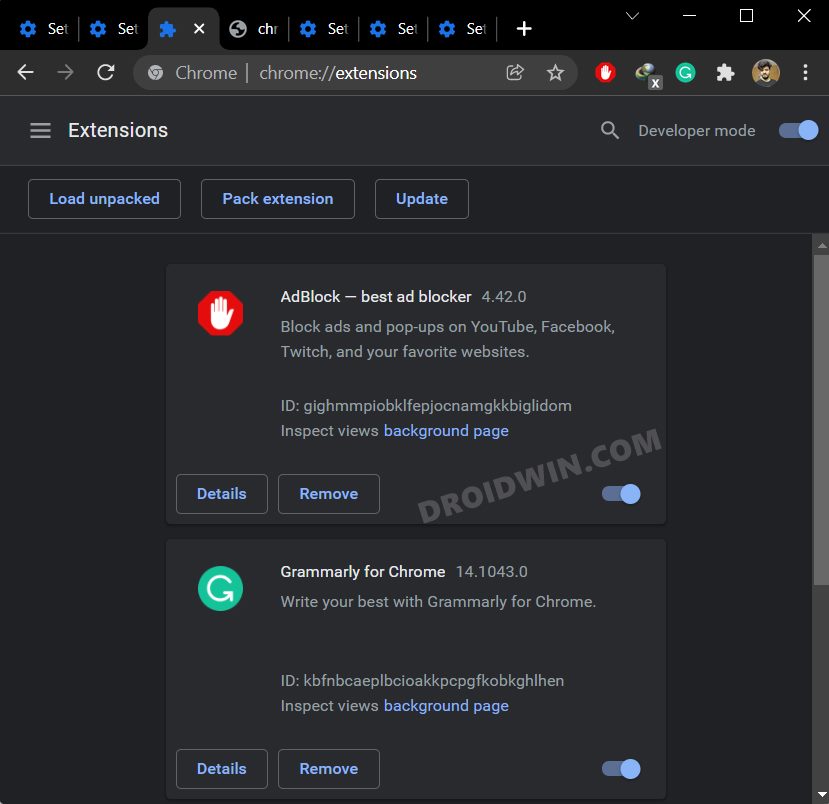
FIX 4: Disable Chrome Extensions
It’s n hidden secret that extensions contribute a lot towards memory consumption. One major reason for that is the fact that it is continuously running in the background while you are working in the browser environment in the foreground. So you could consider disabling these extensions at regular intervals and letting the browser cool down a little bit. Once that happens, you may re-enable the disabled extensions. However, if the extension shoots up the memory resources every time you enable it, then it’s better to remove it from the browser and look out for its alternatives. Here’s how all of this could be carried out:
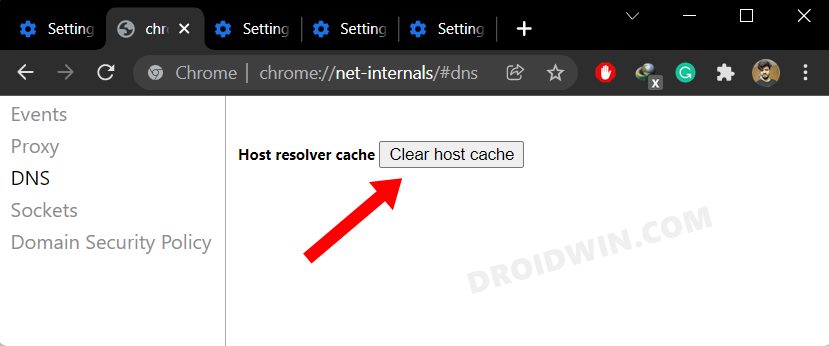
FIX 5: Flush Chrome DNS
Chrome stores the data related to the websites you visit in its Domain Name Server. But if a lot of data gets stored in this record book, then it could slow down the loading of the websites as well have negative consequences on the browser as well. Therefore, consider deleting these data and let the browser repopulate them from scratch the next time you visit that site.
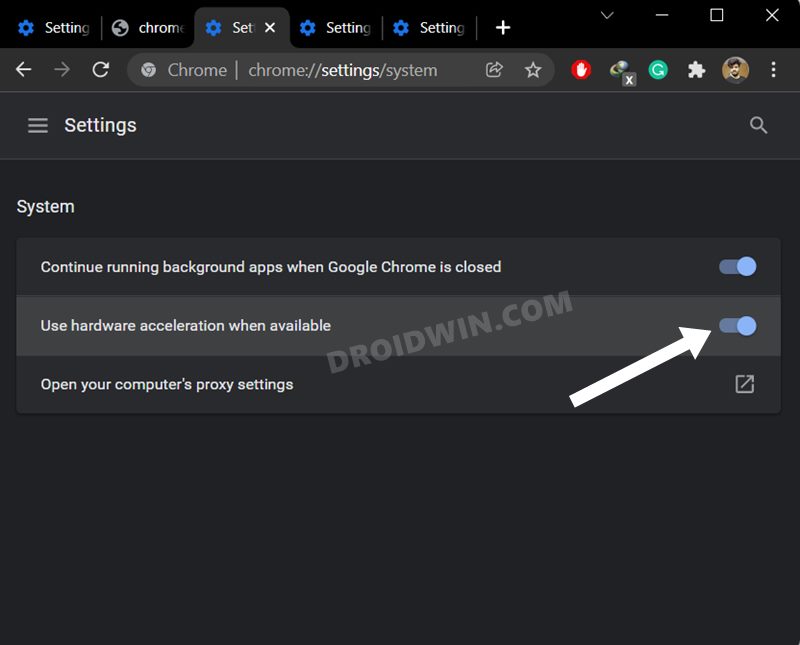
FIX 6: Disable Chrome’s Hardware Acceleration
The Hardware Acceleration feature checks the prowess of your PC’s CPU as well as GPU and if it finds the latter’s processing capability to be much more than the formers, then it allocates the browser’s functionality to the latter aka GPU. But it is still a debatable topic as to how GPU could eclipse the CPU in this aspect, and hence the general advice is to disable this feature. Here’s how it could be done:
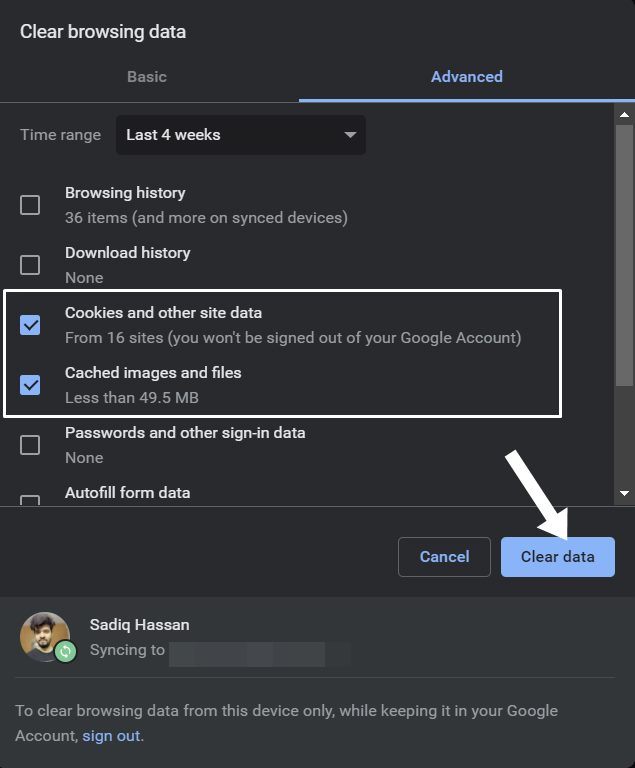
FIX 7: Delete Chrome Data
If a lot of browser data gets accumulated over the due course of time or if the stored data gets corrupted, then it could spell trouble for the entire functioning of the browser. Therefore, you should consider deleting the cookie’s data as well as its cached files. So refer to the below instruction steps to try it out:
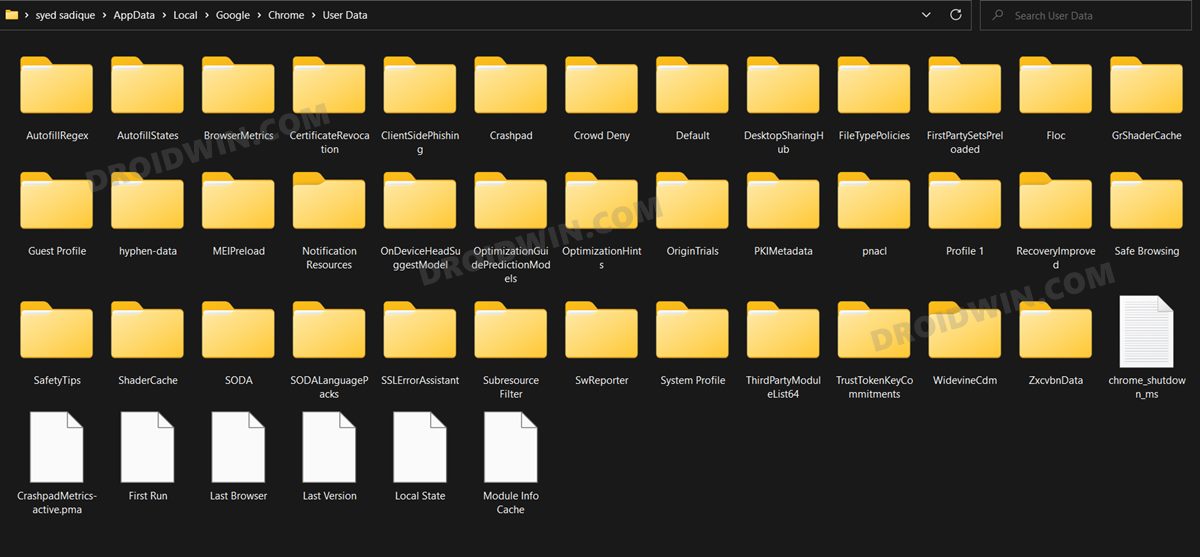
FIX 8: Delete Chrome User Profile
Chrome stores all the browser-related data inside the C Drive. If any of this data gets corrupted, then its repercussions will have to be faced by the entire browser environment. Therefore, you should consider deleting this Profile data and letting Chrome re-populate it from scratch from your Google Account. Do note that this will delete bookmarks, favorites, site settings, cookies, and all the locally saved data (which you could easily get back after signing in with your Google account).
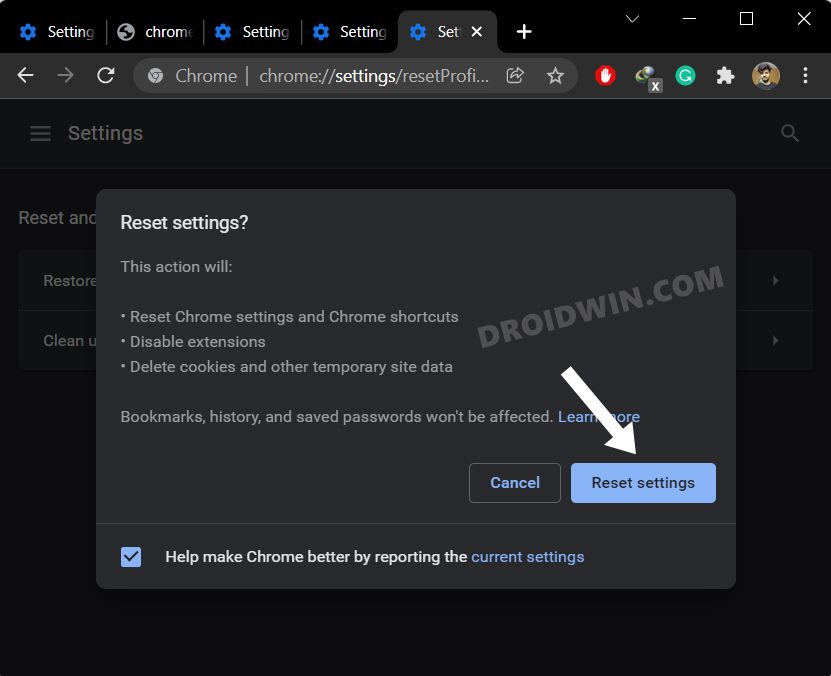
FIX 9: Reset Chrome
If the browser settings and configuration files get corrupted, then the best course of action is to reset the browser to its factory default state, exactly how it was when you first downloaded it. This will remove all the customizations and will revert it back to its original state. So proceed with the below steps and give it a try
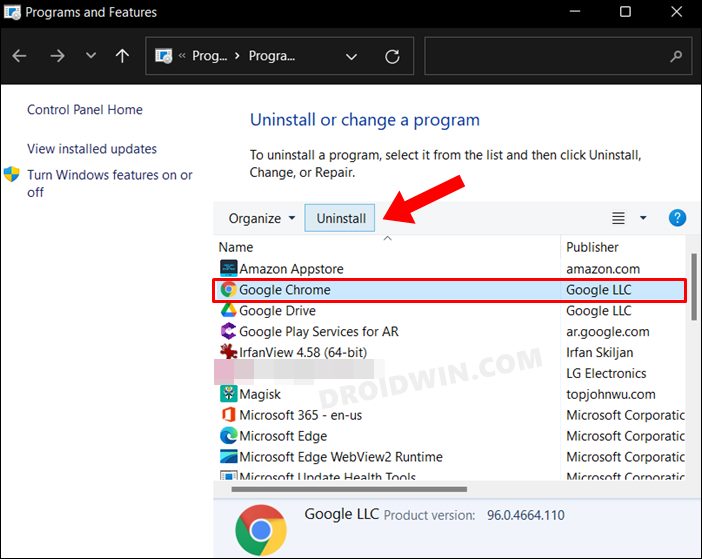
FIX 10: Reinstall Chrome
If none of the aforementioned methods worked out in your favor, then you have no choice but to uninstall and remove all the browser files from your PC and then install its fresh build. Doing so generally resolves all the browser-related issues and there is every chance that it would rectify the current issue as well. So let’s put it to the test right away.
FIX 11: Increase Chrome’s Memory Limit
Google has set a memory limit of 512MB for 32-bit and 1.4GB for 64-bit systems for its browser. You might consider it to be sufficient enough for a browser, however, Chrome is no normal browser! Therefore, let’s increase this memory limit and check out the results. As of now, we will be increasing its limit to 4GB memory for a 64-bit system. You make this RAM allocation selection based on the total physical RAM that your PC has. So with this, we round off the guide on how you could fix the Google Chrome Out of Memory Crash. We have listed eleven different methods for the same. Do let us know in the comments section which one spelled out success for you. Likewise, all your queries are welcomed in the comments section below.
How to Enable Windows 11 Context Menu in Google ChromeGoogle Chrome Not Working in Windows 11: How to Fix [10 Methods]How to Turn off Chrome Notifications in Windows 11How to Open Windows 11 Widgets Articles via Chrome
About Chief Editor