While some are facing density issues, others are complaining of lags and stutters. However, for some, the issue is even more concerning as the mouse isn’t working in the first place. Be it the wireless Bluetooth mouse or the wired one, both of them seem to be getting bugged with this issue. If you are also on the same page, then fret not, this guide is here to help you out. Given here are numerous methods to fix the mouse not working issue in Windows 11. Follow along.
How to Fix Mouse Not Working in Windows 11
Do note that there’s no universal fix as such. You will have to try out each of the below-mentioned workarounds and then see which one gives out the best results. So with that in mind, let’s get started.
FIX 1: The Basic Troubleshooting Steps
Before moving to the slightly advanced tweaks, let’s first try out some of the basic methods.
So start off by unplugging and replugging your wireless’ mouse connector to your PC. Likewise, it is recommended that you connect it to a USB 2.0 Port.Apart from that, also check that the mouse battery hasn’t completely drained out you could put in a battery from another device into your mouse and then check the results).On the other hand, if you have a wired USB mouse, then disconnect and reconnect to the USB 2.0 Port slot.
Try out these tweaks and then check if they are able to fix the mouse not working issue on your Windows 11 PC.
FIX 2: Re-Enable Mouse
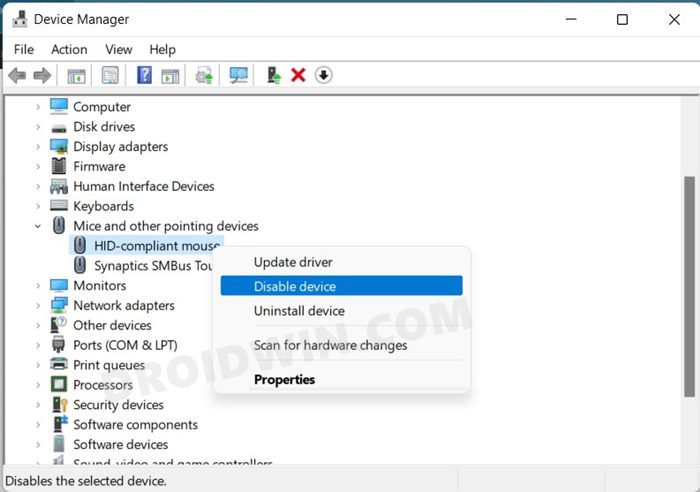
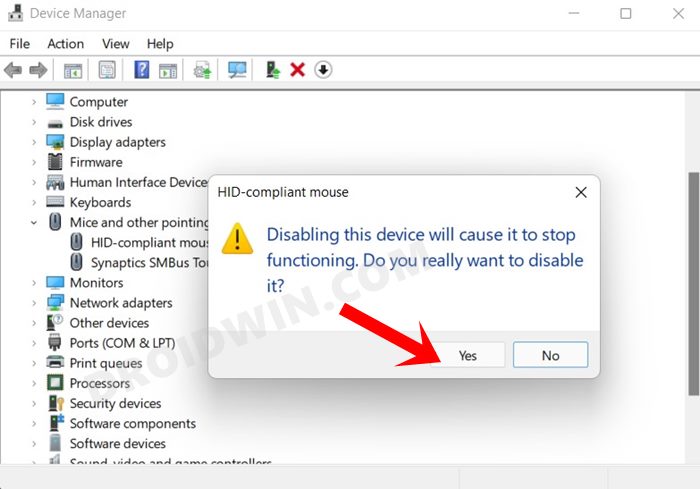
You could also consider disabling and re-enabling the mouse via Device Manager. Doing so will give it a fresh environment to work upon which in turn could rectify the underlying issue as well. So proceed ahead with the below steps: Once the device has been re-enabled, verify whether the mouse not working issue on your Windows 11 PC has been fixed or not.
FIX 3: Update Mouse Drivers
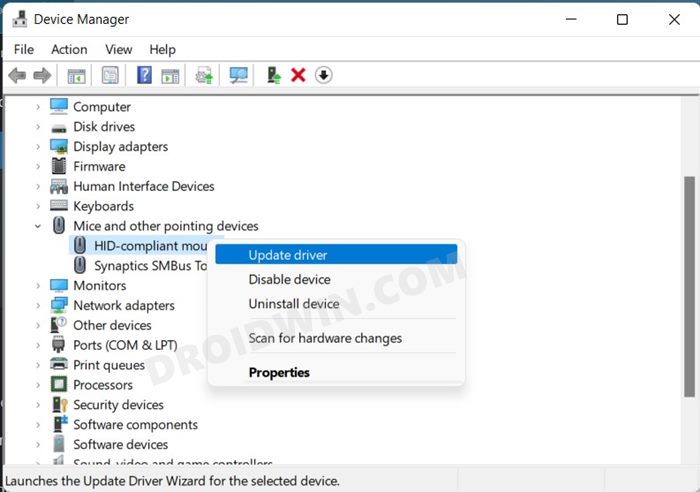
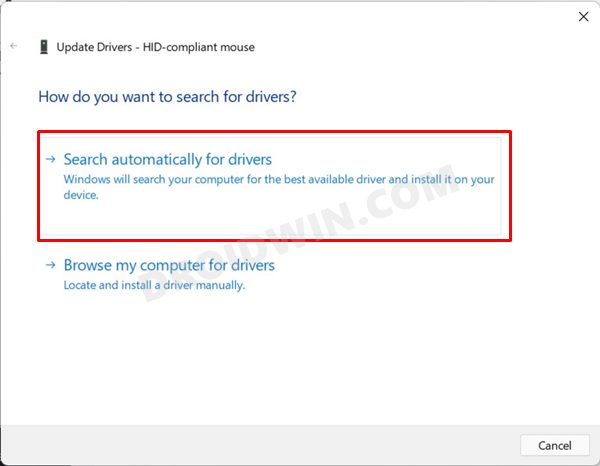
If you are using old or outdated drivers, then it could spell out trouble for the associated device, which in this case is your mouse. Therefore, you should consider updating the mouse drivers to the latest build right away. Here’s how:
FIX 4: Use Hardware and Device Troubleshooter
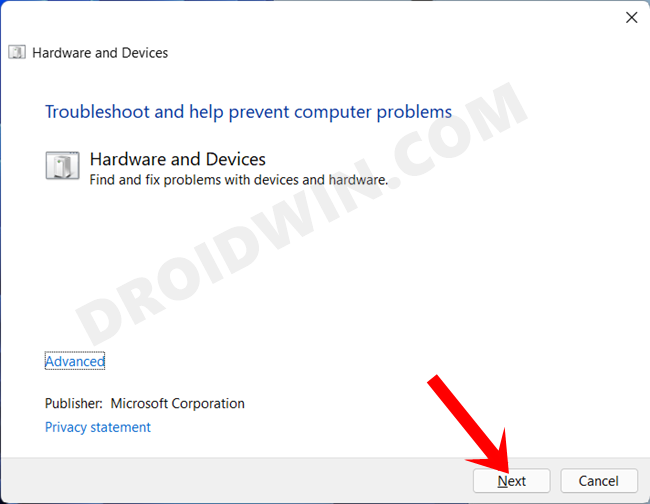
Windows comes with various built-in troubleshooter apps for various device components. And one of them focuses on hardware devices. So will be using that troubleshooter which will scan for underlying issues related to the mouse and will then bring up the associated fixes as well. But as opposed to other troubleshooter apps that could easily be accessed via the Settings menu, Windows has hidden the Hardware and Device Troubleshooter from that section.
So please refer to our guide to Enable and Use Hardware and Devices Troubleshooter in Windows 11. Once enabled, connect your mouse to the PC and run the test. It shall then perform a scan on the mouse and bring in the associated fixes as well. Just click on the appropriate fix from the list to apply it and then restart your PC. Once it boots up, check if the mouse not working issue on your Windows 11 PC has been fixed or not.
FIX 5: Restart File Explorer
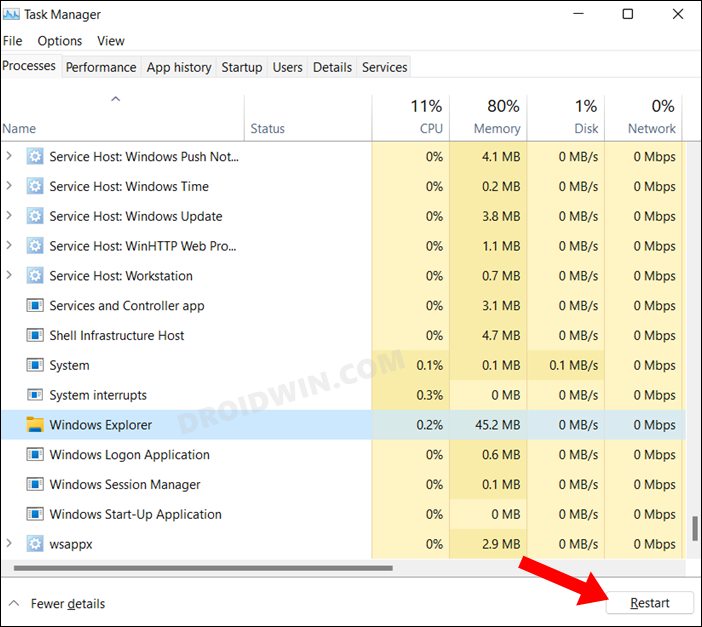
Recently a bug in the File Explorer resulted in the mouse not working along the expected lines. While some users reported that the cursor was lagging, freezing, or stuttering, others had a more severe issue wherein the mouse wasn’t functioning in the first place.
To resolve this, they had to restart the File Explorer [though a permanent fix was rolled out by Microsoft later on]. So let’s put this fix to the test this time around as well and check out the results.
FIX 6: Using SFC and DISM Command
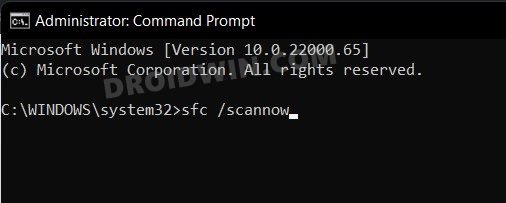
System File Checker and Deployment Image Servicing and Management are two command-line utility tools that scan for the corrupt Windows files and then replace them with their working counterpart. The major difference between the two is whereas the SFC replaces the corrupt files with the working ones from the cached directory on your PC, DISM does so by downloading the working files from the online Microsoft servers. And as of now, we would be making use of both these tools to fix the underlying mouse issue. Follow along. Once DISM finishes the scanning, it is recommended to reboot your PC. Once it boots up, check if the mouse not working issue in Windows 11 has been fixed or not.
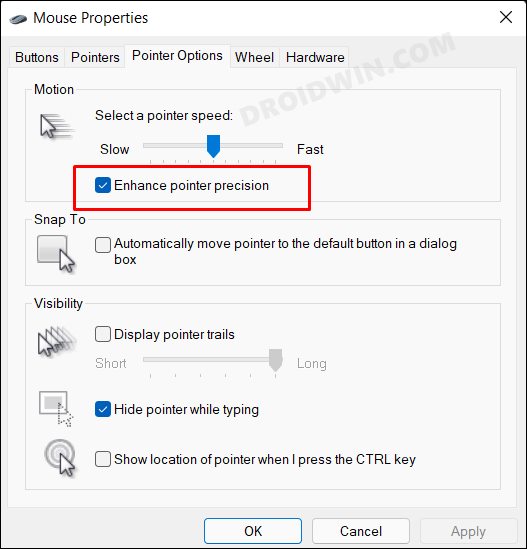
FIX 7: Disable Enhance Pointer Precision
If your mouse is lagging, freezing, or behaving in a rather abrupt manner, then you should consider disabling the ‘Enhance Pointer Precision’ feature. Here’s how it could be done:
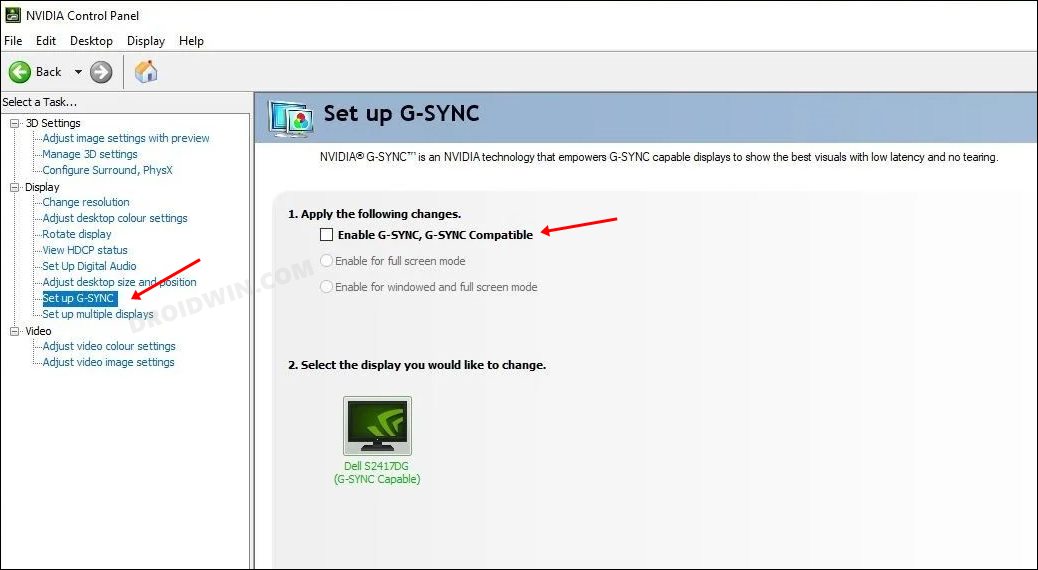
FIX 8: Disable Adaptive-Sync
If you are using a high-end display monitor, preferable 4K with a 144Hz refresh rate, and having Nvidia’s GPU, then the latter’s Adaptive Sync functionality might cause a conflict or two with your mouse. Therefore, you should consider disabling this feature, using the instructions given below:
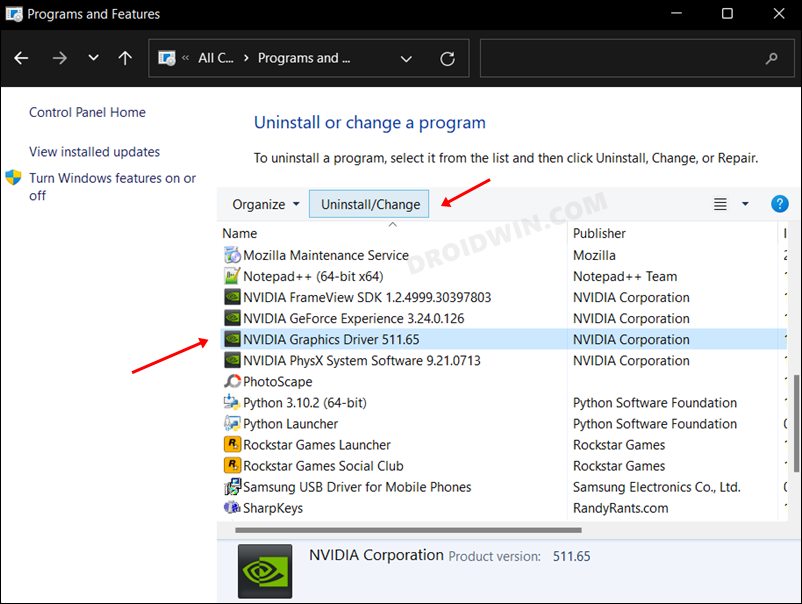
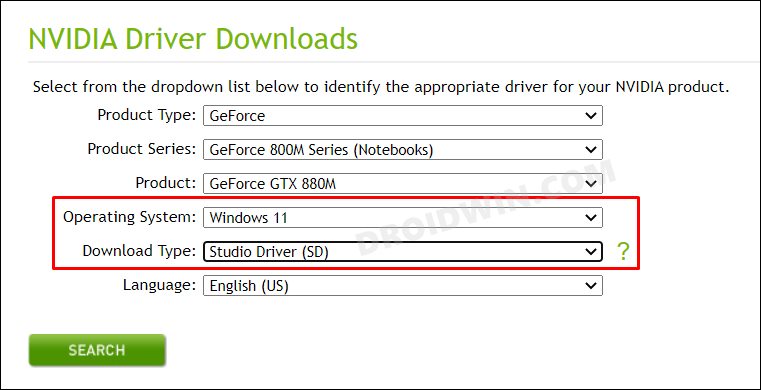
FIX 9: Install Nvidia Studio Drivers
If the mouse is mostly causing issues in graphics-intensive tasks, then you could consider uninstalling the default Game Ready drivers and then installing the Studio Drivers which are specifically designed for processes that consume high graphic resources. here’s how it could be done:
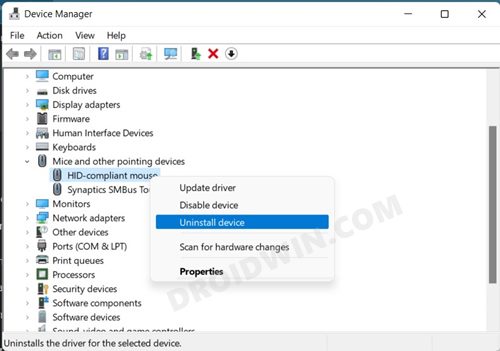
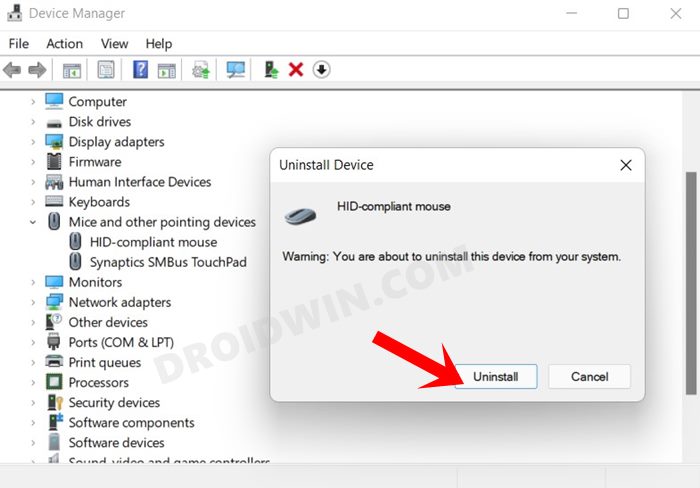
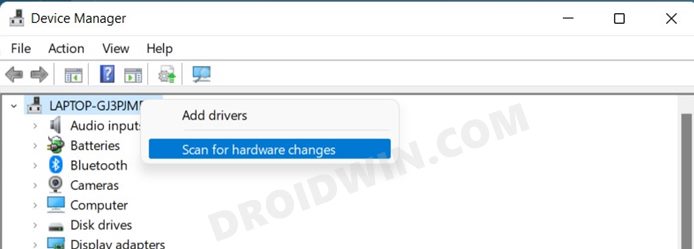
FIX 10: Re-Install Mouse Drivers
If none of the aforementioned methods managed to spell out success for you, then the last course of action should be to uninstall the mouse drivers and then install their latest version. This reinstallation of the mouse drivers should end up fixing most of the mouse-related issues, including the one that we are currently dealing with. So with this, we round off the guide on how you could fix the mouse not working issue on your Windows 11 PC. We have listed five different methods for the same. Do let us know in the comments section which one spelled out success for you. Likewise, all your queries are welcomed in the comments.
How to Fix Camera/Webcam Not Working in Windows 11How to Fix Bluetooth not working issue in Windows 11Fix Windows 11 Search Not Working Issue [5 Methods]Keyboard Not Working in Windows 11: How to FixHow to Fix File Explorer keeps crashing in Windows 11
About Chief Editor
