However, the general user wishes to maintain a safe distance from it. The major reason for that is the plethora of risks and complications that rooting brings in with itself. Right from SafetyNet Issues to the device getting boot looped/bricked, there are quite a few issues that you might have to go through. Then there’s the third set of users, who falls in between them. They are willing to root their device but at the same time, the associated risks aren’t allowing them to do so. What they want is a small window of opportunity from which they could temporarily root their Android device via Magisk, check out if everything is working fine or not, and then decide accordingly. If you are also in the same group, then this guide is here to help you out. Follow along.
How to Temporarily Root an Android Device via Magisk
The below instructions are listed under separate sections for ease of understanding. Make sure to follow in the exact same sequence as mentioned. Droidwin and its members wouldn’t be held responsible in case of a thermonuclear war, your alarm doesn’t wake you up, or if anything happens to your device and data by performing the below steps to temporarily root your Android device via Magisk.
STEP 1: Install Android SDK
First and foremost, you will have to install the Android SDK Platform Tools on your PC. This is the official ADB and Fastboot binary provided by Google and is the only recommended one. So download it and then extract it to any convenient location on your PC. Doing so will give you the platform-tools folder, which will be used throughout this guide.
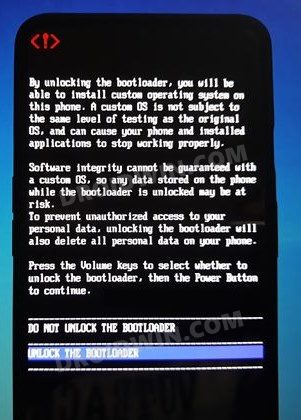
STEP 2: Unlock the Device’s Bootloader
First snd foremost, you will have to unlock the device’s bootloader. Doing so will wipe off all the data from your device and could also nullify its warranty. So if that is all well and good, then please refer to our guide on How to Unlock the Bootloader on Any Android Device.
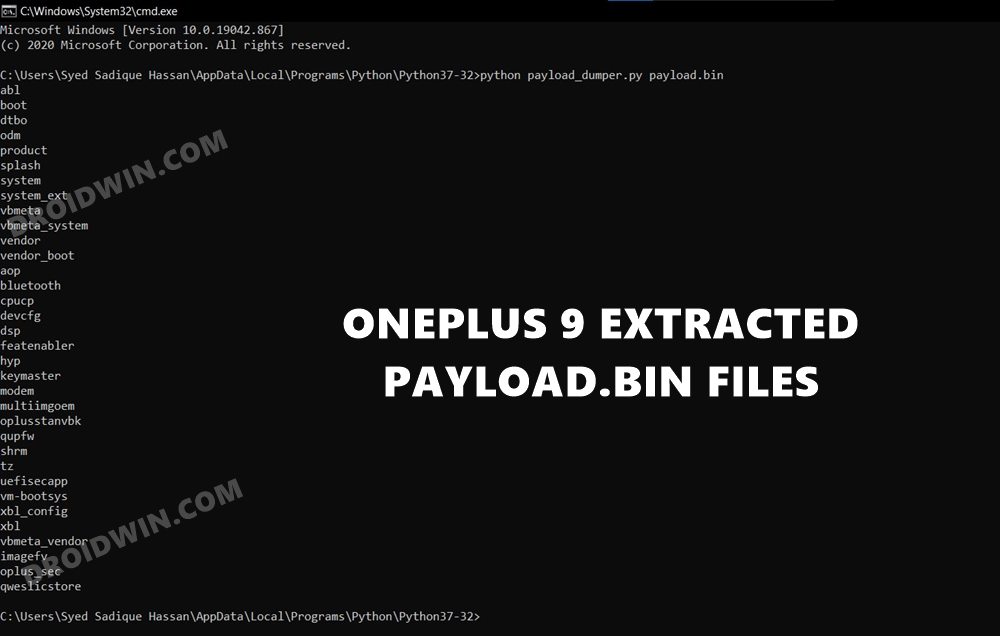
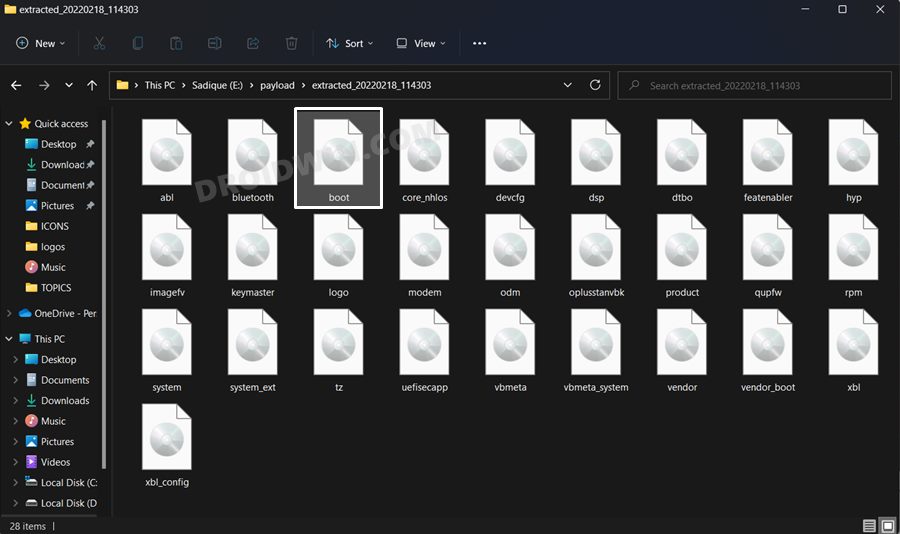
STEP 3: Get Stock Boot.img File
Next up, download the firmware file that is currently installed on your device. Make sure that its firmware version matches the installed one. Once downloaded, extract it to any convenient location on your PC. If you own a Pixel device, then you would directly see the boot.img file. On the other hand, OnePlus users should see the paylaod.bin file. So refer to our guide on How to Extract payload.bin and get the stock boot image file.
Oppo and Realme users should see the OZIP file. They could extract it via How to Extract Fastboot Images from Realme/Oppo OZIP Firmware. Then if we talk about Sony devices, they should convert the boot.sin file to boot.img using the instructions given here: How to Extract Sony Boot.sin and get the Stock Boot.img File.
LG users would have to deal with DZ/KDZ firmware, as given here: How to Extract Boot.img from LG KDZ or DZ Firmware. So refer to the guide corresponding to your device and get hold of the stock boot.img file. Once done, move over to the next step to temporarily root your Android device via Magisk.
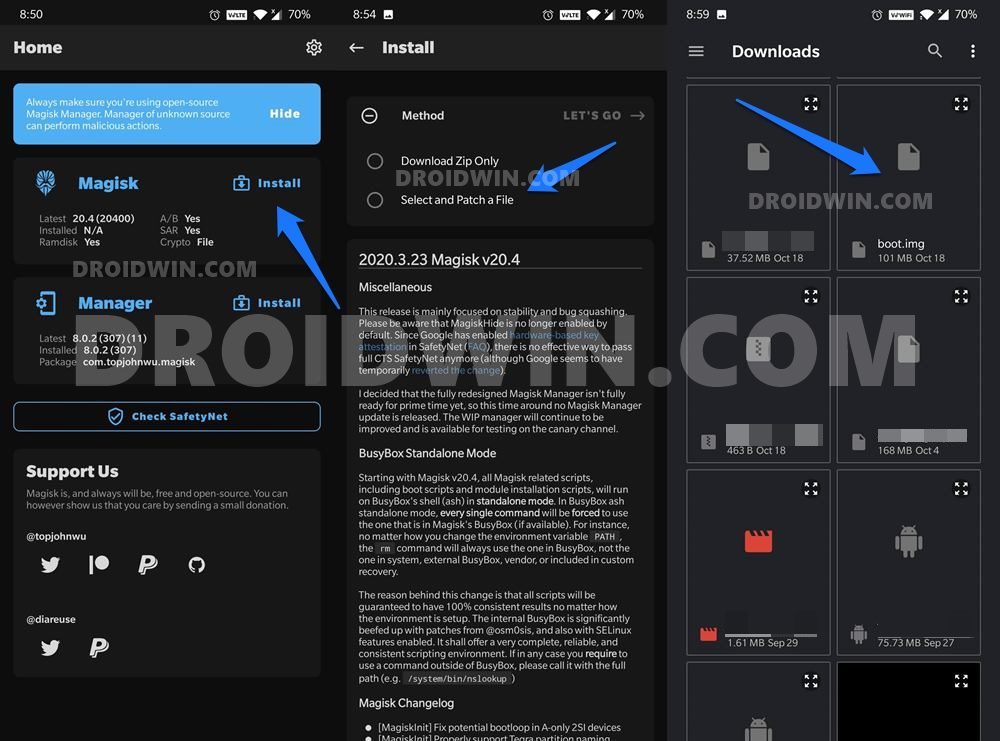
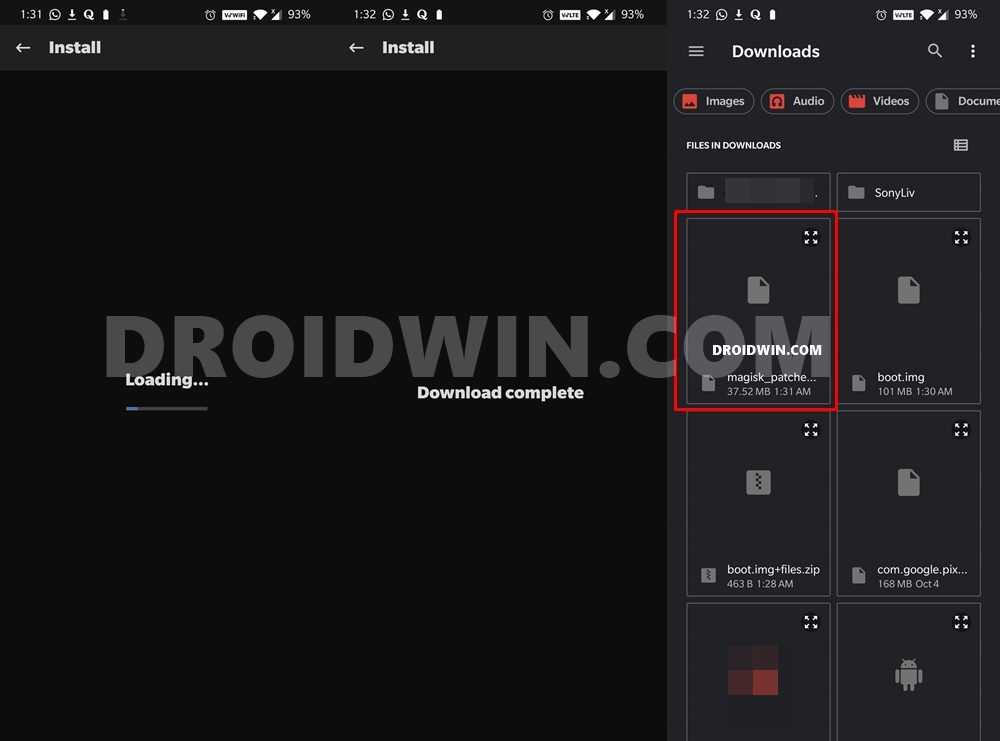
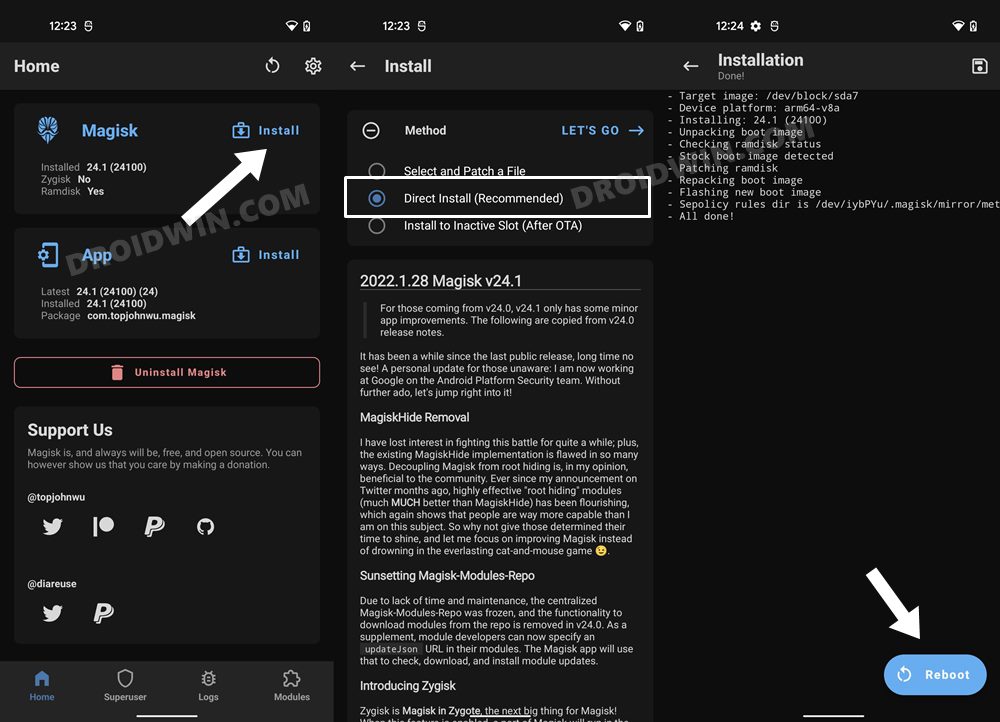
STEP 4: Patch Stock Boot.img File via Magisk
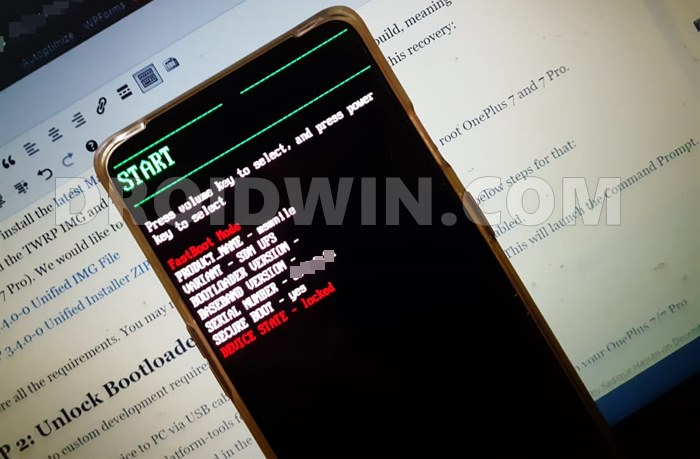
STEP 5: Boot Device to Fastboot Mode
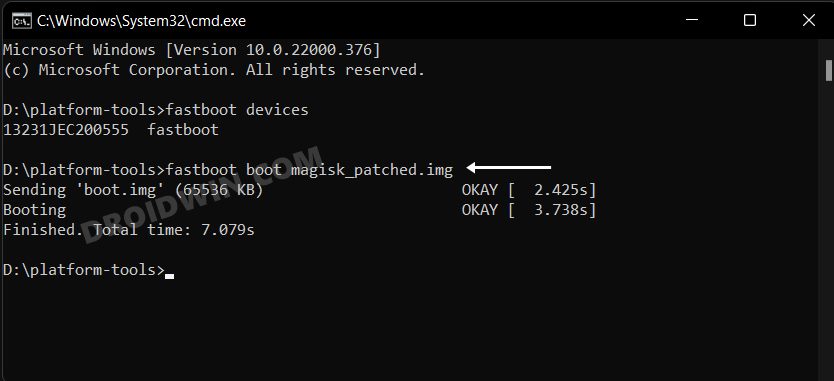
STEP 6: Boot Magisk Patched Boot.img | Temporary Root Android
Now comes the most important part of this guide to temporarily root your Android device via Magisk. We would now be temporarily booting your device via the magisk patched boot.img. However, do keep in mind that this is a one-time root. The next time you reboot your device, the root would be gone. Therefore, when the device is rooted, it is highly recommended that you don’t do any heavy modifications to the system partition. This is because when your device boots the next time, it wouldn’t be having root and if you have installed any mods that are root dependent, then it would result in your device going to a bootloop. Tasks such as making changes to build.prop, changing app permissions, uninstalling a system app, checking whether a banking apps conflicts with Safetynet, could all be performed without any issues. Howevr, if you are planning to install a module, then make sure to uninstall it before the next reboot. With that said, let’s now make you aware of the steps to temporarily root your Android device via Magisk. So with that, we conclude the guide on how to temporarily root your Android device via Magisk. If you have any queries concerning the aforementioned steps, do let us know in the comments. We will get back to you with a solution at the earliest.
How to Root Android Devices Without TWRP RecoveryHow to Root Android Devices via TWRP RecoveryPatch Stock Boot Image via Magisk and Flash it using FastbootRoot Android 11 via Magisk Patched boot.img (without TWRP)
About Chief Editor