However, in some instances, these updates might break a few system functionalities. For example, a few months back Windows 11 rolled out an update that ended up making the Start Menu and Taskbar inoperable (in its defenses, the update was still in the Beta Phase). Along the same lines, the update might also cause conflict with drivers or peripheral devices. In all these scenarios, the best bet is to uninstall these buggy Windows 11 updates from your PC. And in this guide, we will show you how to do just that. Follow along.
How to Uninstall Windows 11 Updates via Settings/CMD/Recovery
There are three different methods to remove Windows 11 updates: using the Settings Menu, via Command Prompt, and through Windows Recovery. We have listed all these three methods below, you may try out the one that you find easier to deal with. So with that in mind, let’s get started.
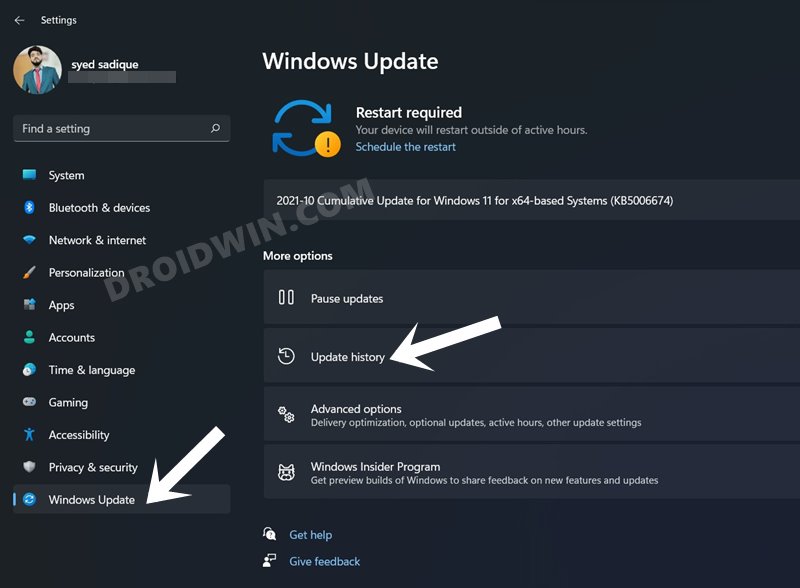
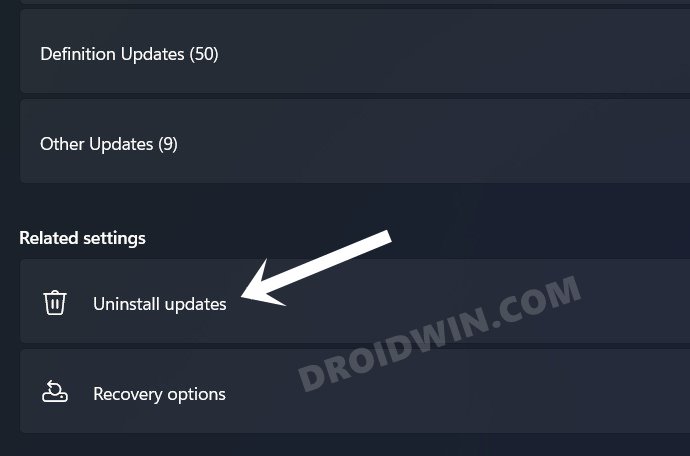
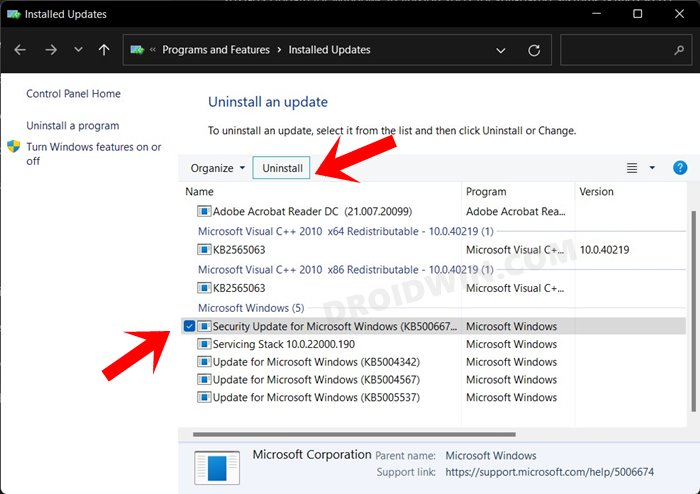
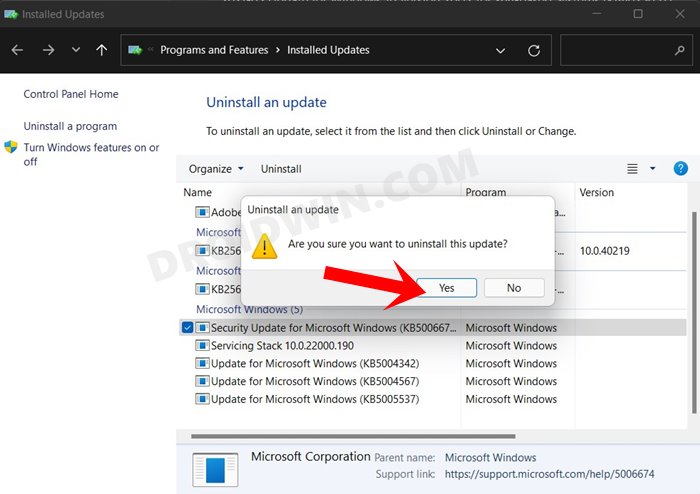
Method 1: Uninstall Windows 11 Updates via Settings
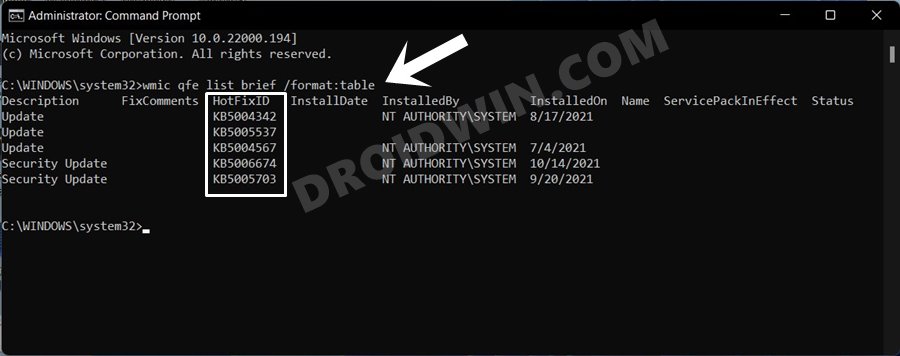
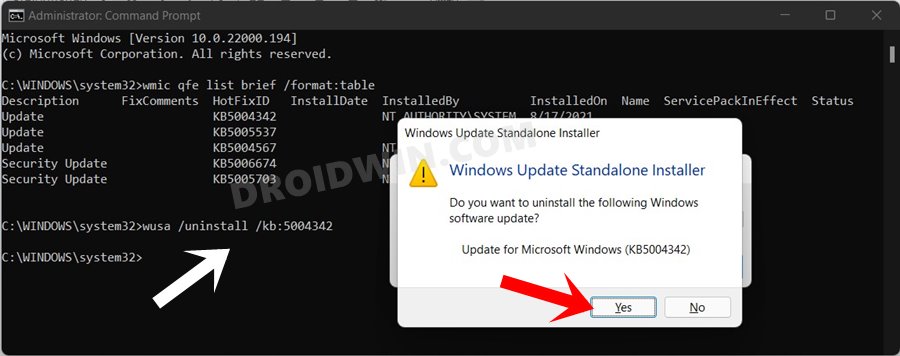
Method 2: Uninstall Windows 11 Updates via Command Prompt
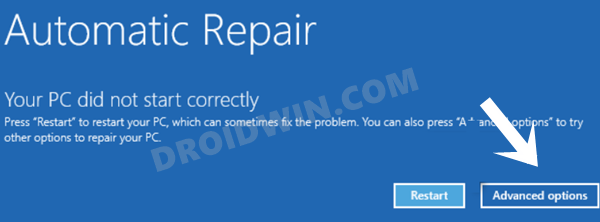
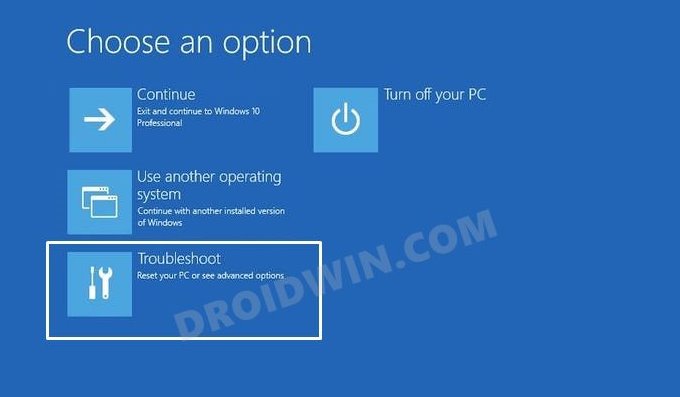
Method 3: Uninstall Windows 11 Updates When PC Cannot Boot
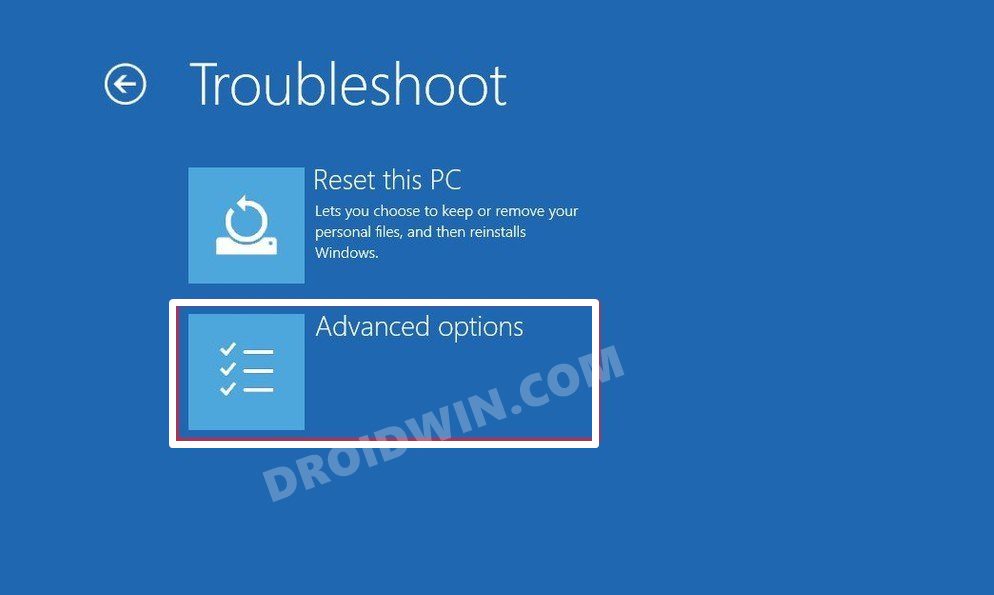
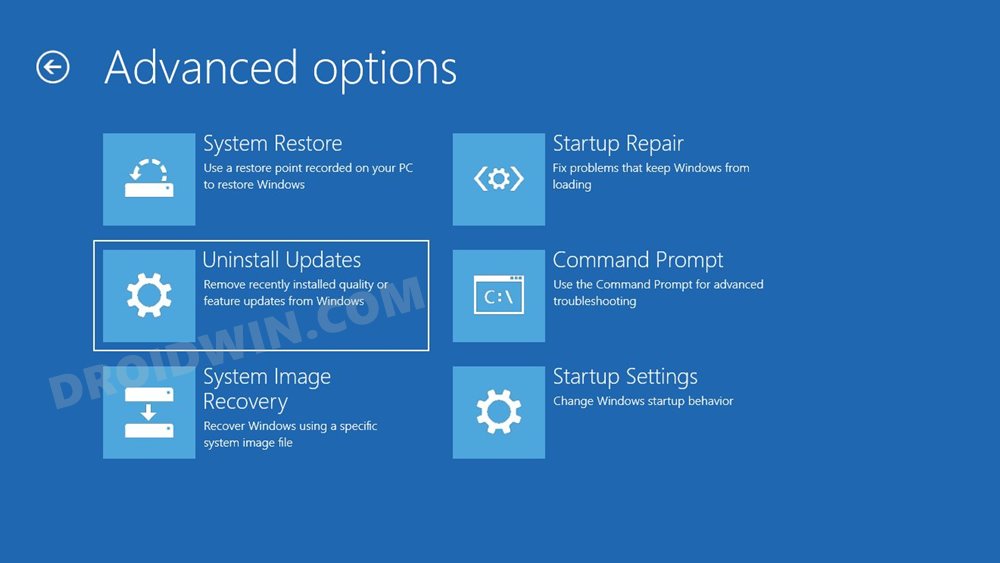
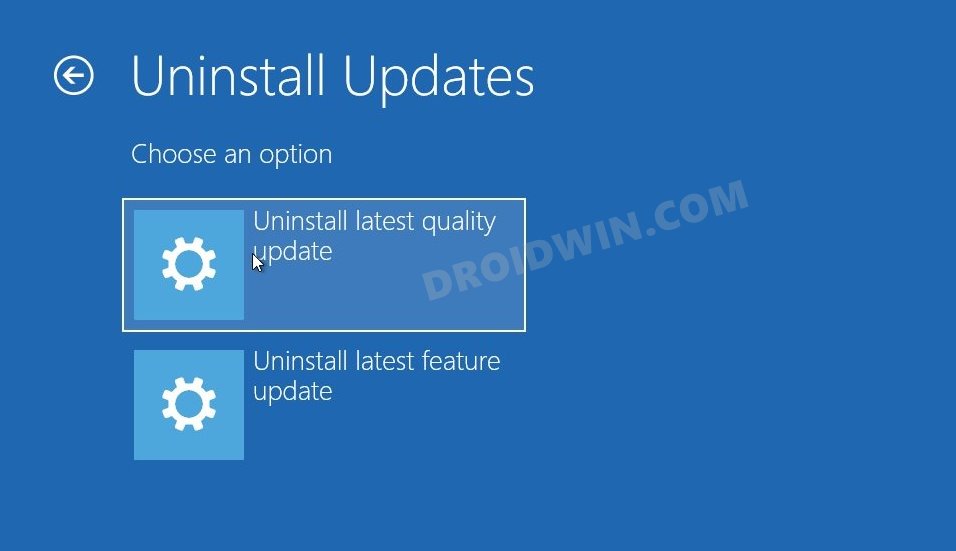
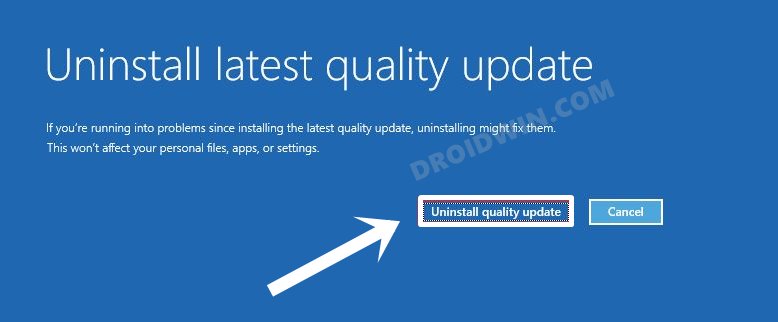
In this method, we will be uninstalling the update via the Windows Recovery Environment. This approach comes in handy if your PC is unable to boot to the OS after installing a buggy update. In this regard, the entire process will be carried out by making use of the hidden Windows Automatic Repair Mode, which gets invoked once your PC crashes three consecutive times. So without any further ado, let’s get started. That’s it. These were three different methods to uninstall Windows 11 updates from your PC. Do let us know in the comments section which one you ultimately decided to settle for. Likewise, all your queries are welcomed in the comments below.
How to Uninstall Apps using Command Prompt (CMD) or Powershell in Windows 11How to Uninstall Microsoft Edge in Windows 11UWP Apps in Windows 11: Location, URI, Shortcut, Uninstall[5 Methods] How to Disable or Uninstall OneDrive in Windows 11How to Disable or Uninstall Cortana in Windows 11
About Chief Editor

